
This upside down apple tart with puff pastry is my easy version of tarte tatin, a classic French bakery dessert. It’s just apples, butter, honey, and brown sugar, but the final result is worthy of a pastry case!
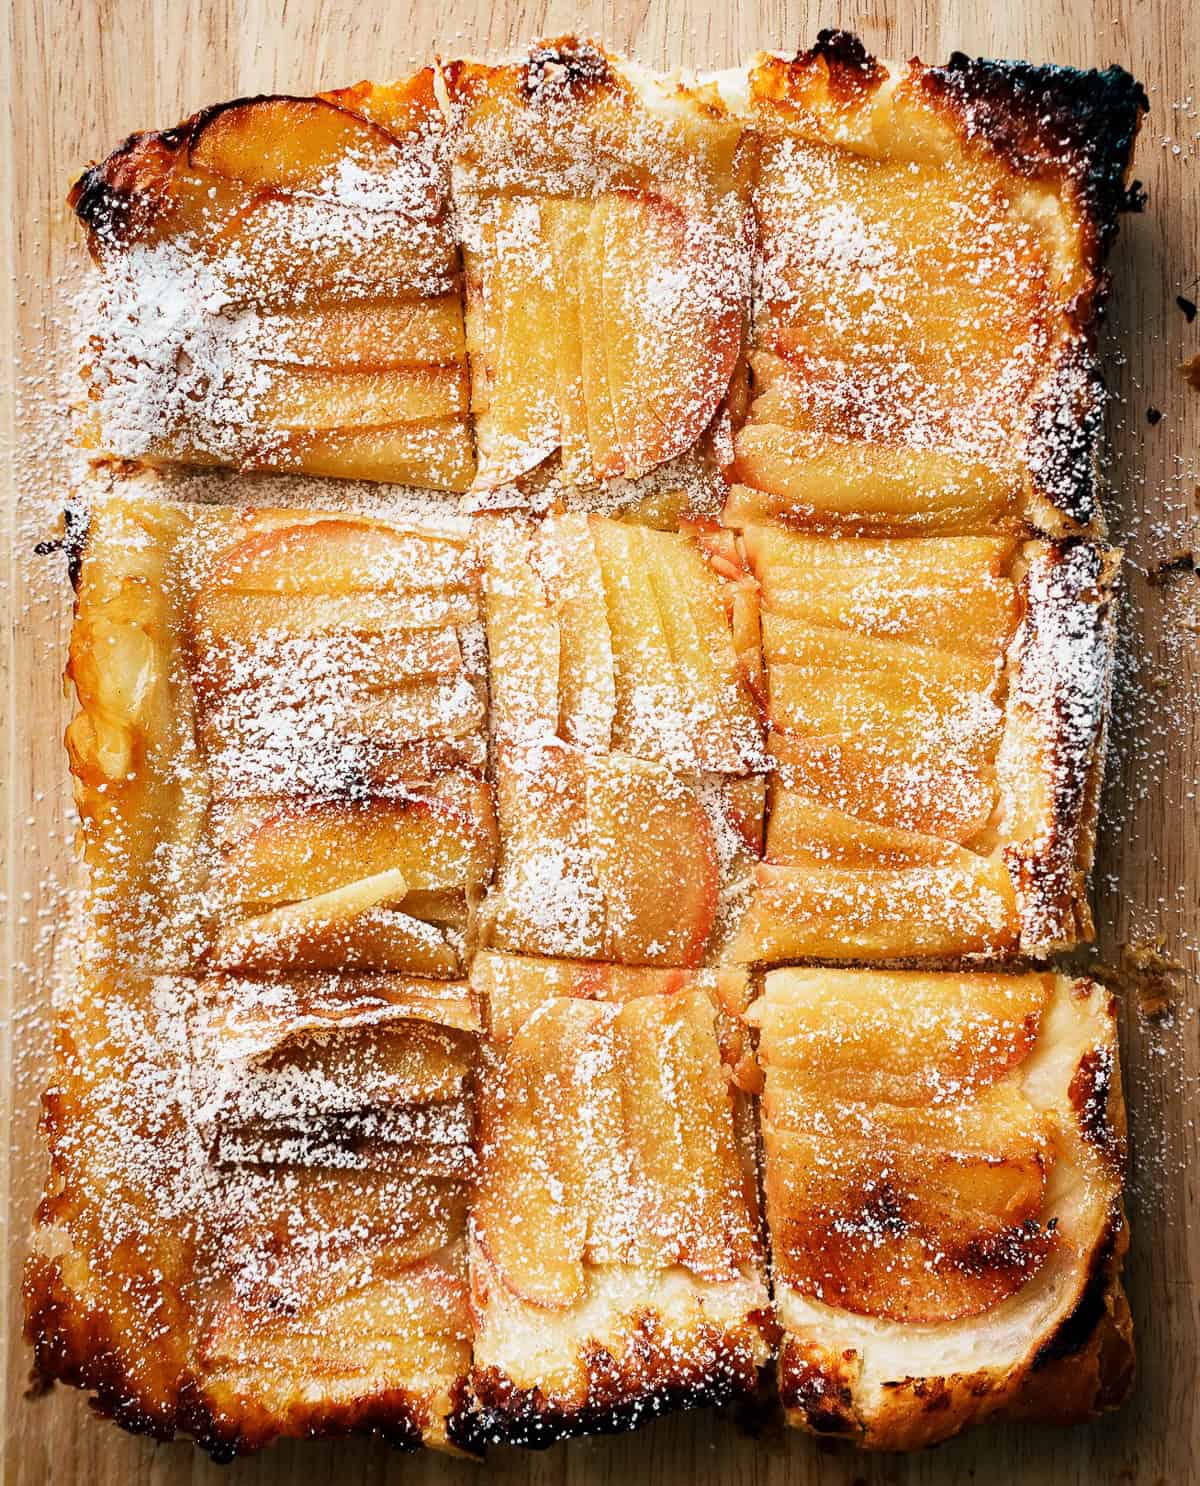
A simplified version of a French classic.

I spend a fair amount of time in France, and every bakery has some version of a simple tart with a flaky pastry crust with thinly sliced fruit on top.
It’s sort of like our version of an apple crisp. Very few ingredients, but the cohesive result is utter perfection.
Tarte tatin is similar to these simple tarts in that it’s apples and pastry, but the apples are cooked on the stove in a caramel sauce frist, then the pastry is draped on top. It’s baked, then flipped onto a serving plate.
I’ve made one before, and while delicious, the caramel aspect makes it more advanced.
This upside-down apple tart is the best of both worlds!
You have the caramel-sweet apples and the flip like tarte tatin, but it’s much easier to make at home because everything cooks hands-free on a sheet pan.
Looking for an easy apple dessert that skips the pastry altogether? Try these Baked Apple Slices.
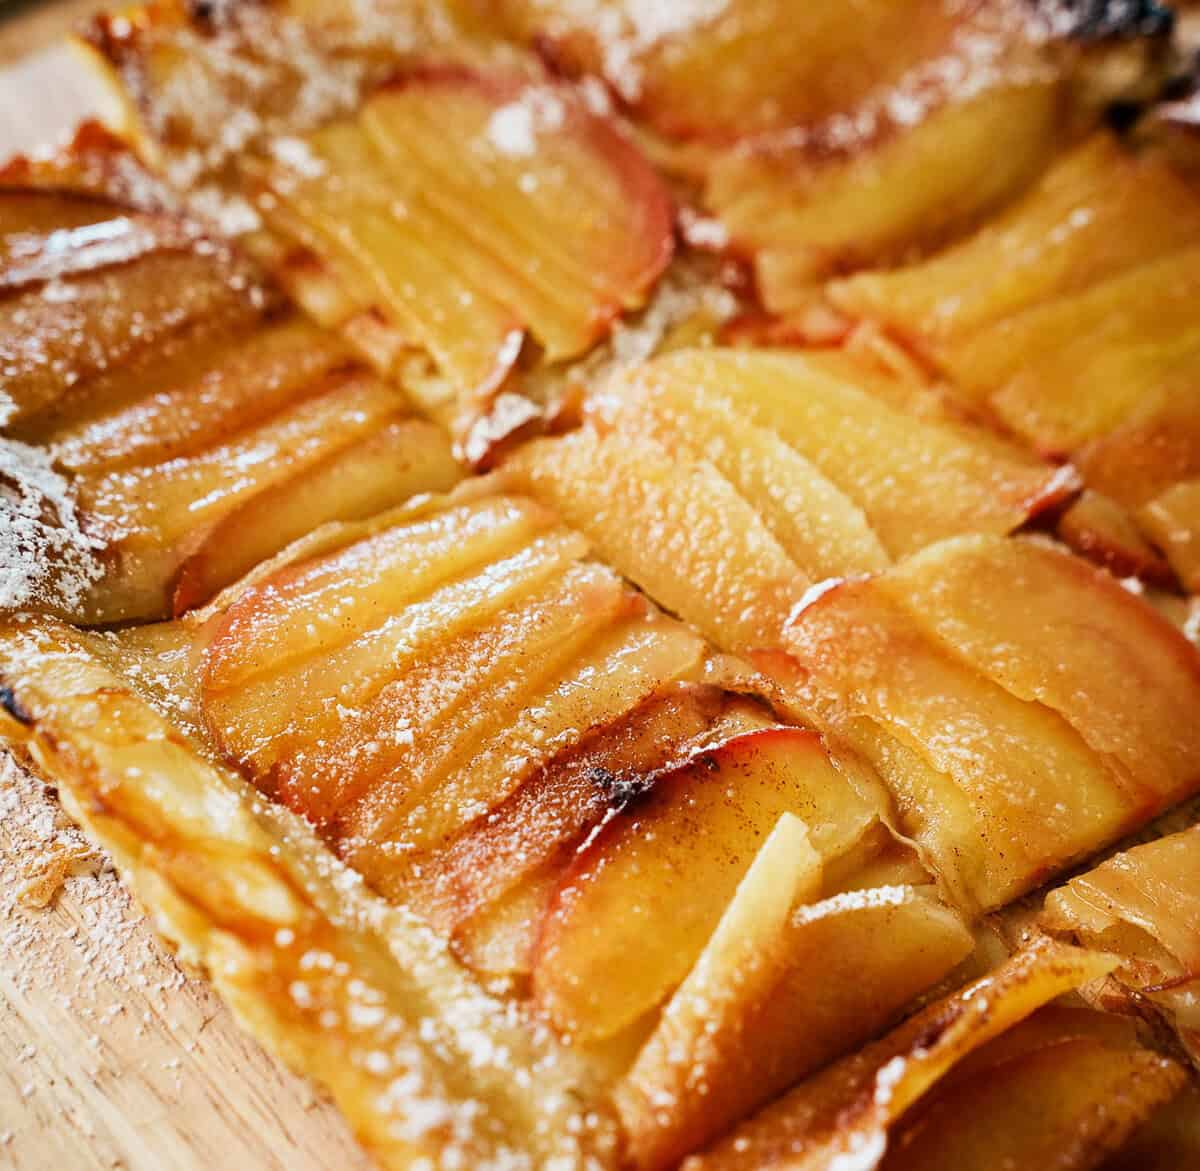
Key Ingredients
You’ll find the full list of ingredients in the recipe card below, but here are some notes to keep in mind.
- Apples. Pick a firm apple that holds up to baking. I like sweet-crisp apples like Honeycrisp and Jazz, but Granny Smith or a tart baking apple from your favorite orchard works too.
- Puff Pastry. Found in the freezer section of the grocery store. This is a critical incredient, so don’t skimp and buy the cheapest brand. I like Peppridge Farm.
- Butter, Honey, and Brown Sugar. These caramelize with the apples’ juices to create the sweet, shiny top.
- Cinnamon. Cinnamon isn’t traditionally added to French apple tarts (Americans use cinnamon much more often than the French do), but I add it because I’m still an American girl, and I love it! You do you.
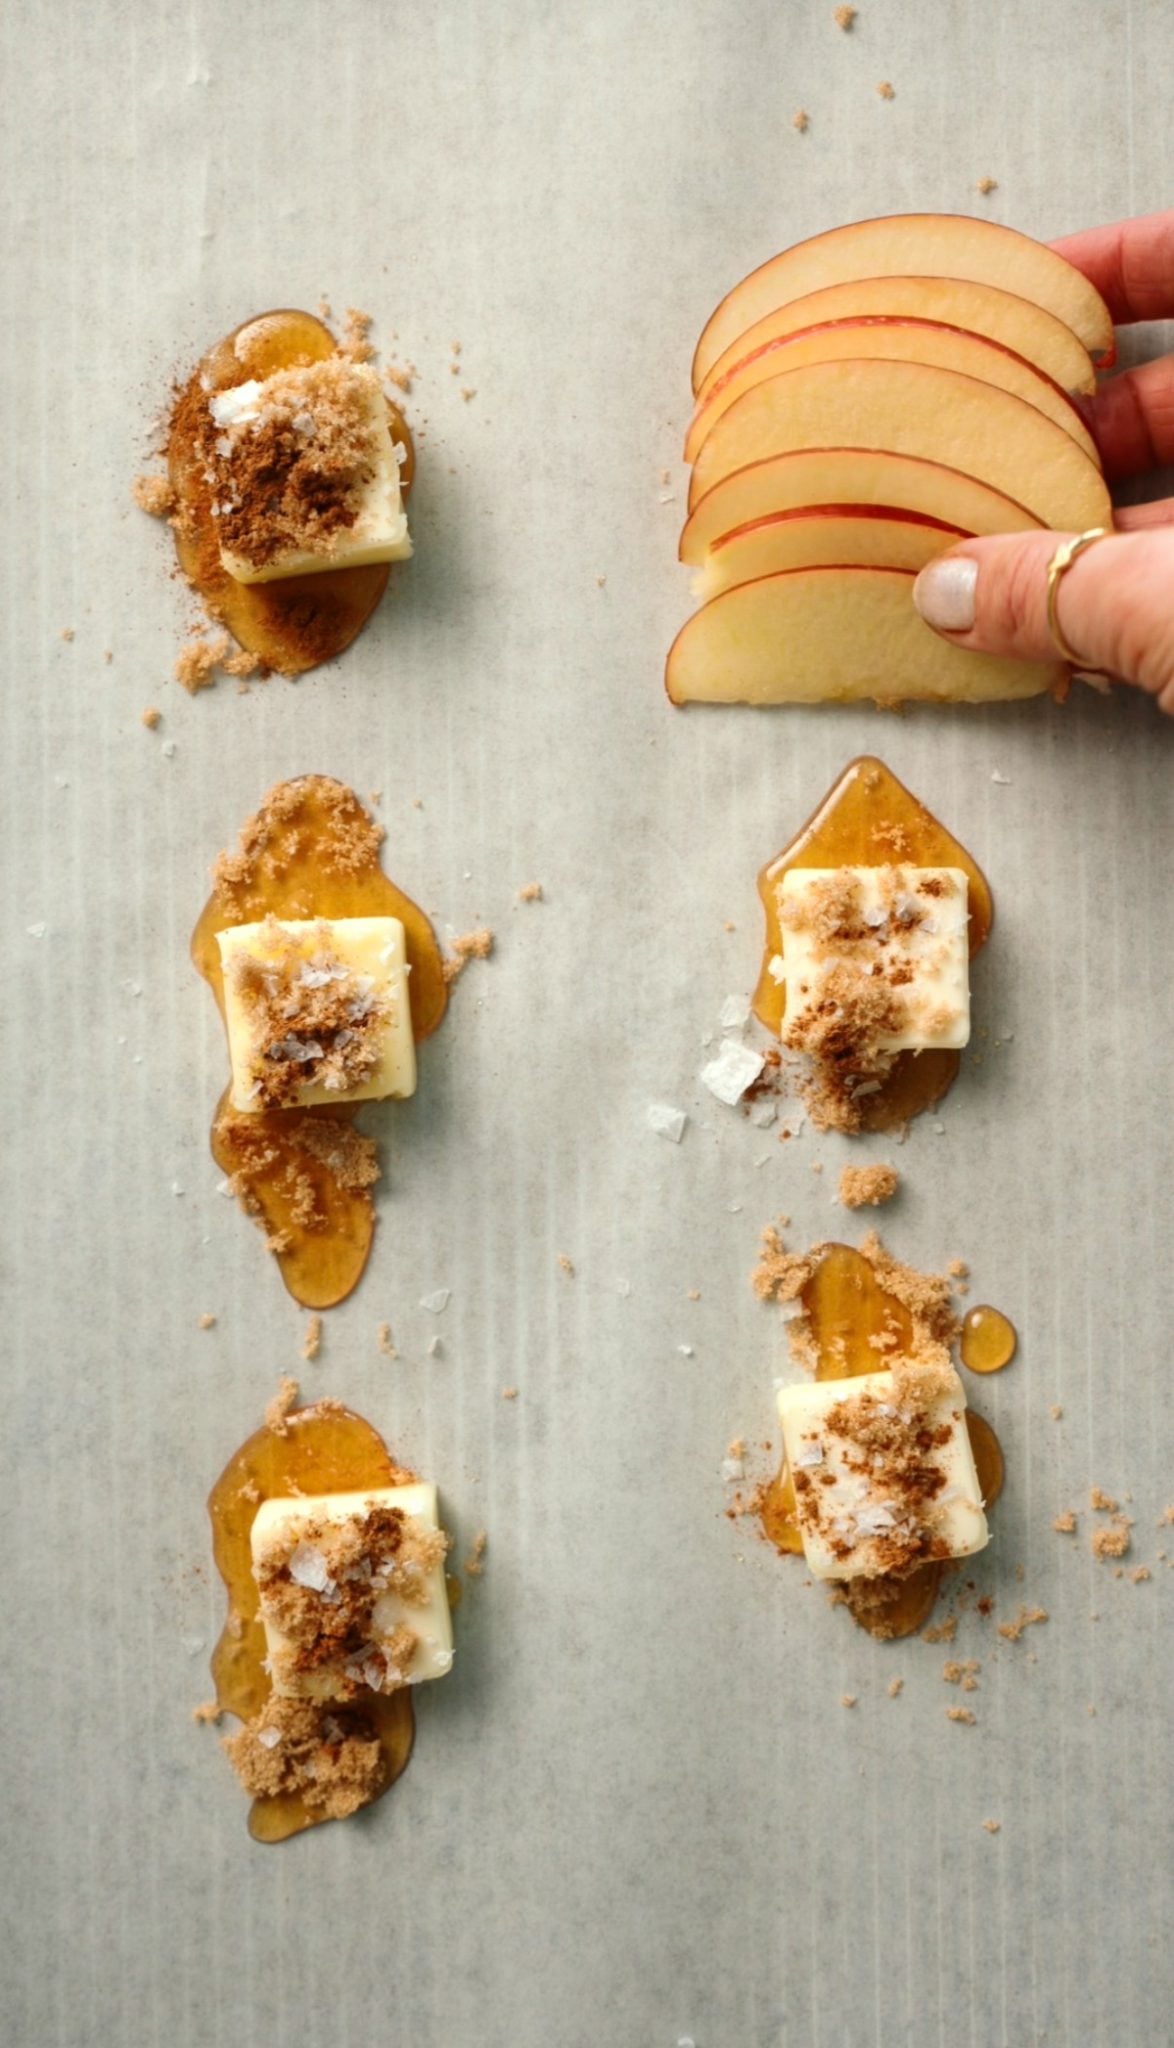
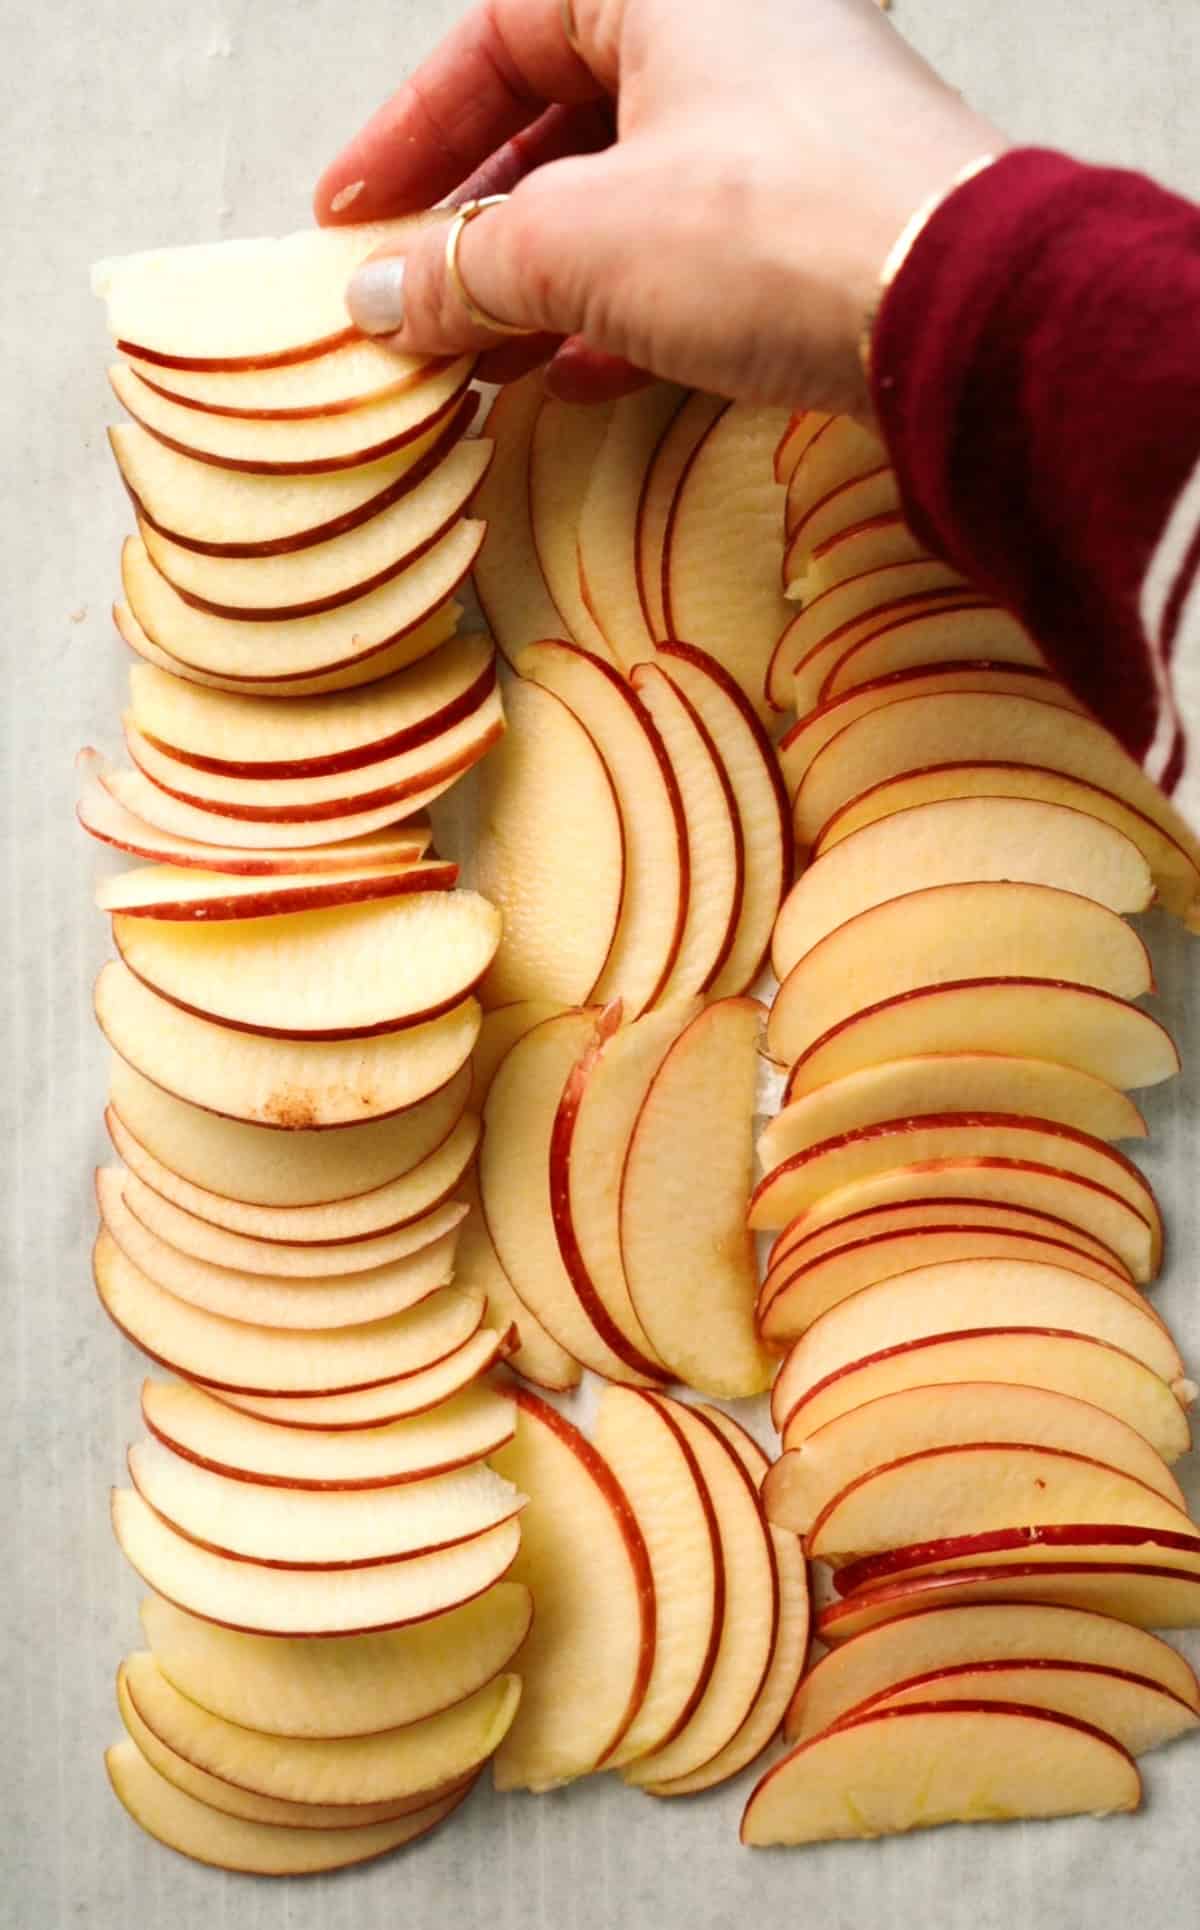
Tips for Slicing and Arranging the Apples
- Slice THIN. Aim for apple slices 1/8 inch or thinner. Any thicker and they won’t cook through. I recommend a mandoline slicer like this inexpensive one.
- Peels On or Off. I leave the peels on the apples for upside down apple tart. I like the touch color, and because the apples are so thin, you don’t really notice the peels. That said, if you prefer peeled apples in your desserts, you can certainly do so.
- Pack the Slices in Close. As you fan the apple slices in rows, really tuck them in close so that, once they cook down, you’re not left with open spaces of pastry.
More Delicious Apple Desserts
Upside Down Apple Tart
Email Me the Recipe!
From time to time, we’ll send you Well Plated emails. You can unsubscribe anytime. Have an account? Log In.
Ingredients
- 4 to 6 tablespoons honey
- 6 tablespoons unsalted butter sliced into 6 even pieces
- 2 tablespoons light brown sugar
- 1 ½ teaspoons ground cinnamon
- ½ to 1 teaspoon flakey sea salt or kosher salt
- 2 medium Honeycrisp Granny Smith, or similar crisp apples, sliced 1/8 inch thick
- 1 sheet frozen puff pastry thawed according to package directions
- 1 large egg beaten with 1 teaspoon water to create an egg wash
- Powdered sugar optional for serving
Instructions
- Preheat the oven to 400°F. Line a rimmed baking sheet with parchment paper (make sure it’s rimmed, the juices will flow!).
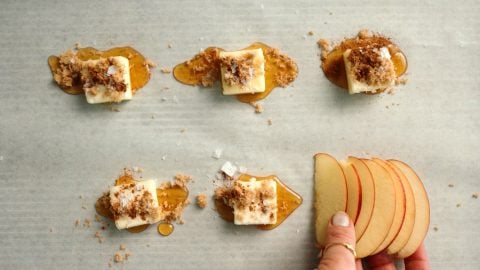
- Drizzle the honey onto the parchment in 6 evenly spaced “squiggles” creating 2 rows of 3. For each, draw a straight line with the honey that is about 2 inches long, then swirl the honey back and forth over the line in an “S” shape (see video). Set a pat of butter in the center of each. Your goal is to create a “grid” to lay the pastry on.
- Sprinkle each pat of butter with a pinch each of brown sugar, cinnamon, and salt (exact measurements aren’t necessary; just eyeball it).

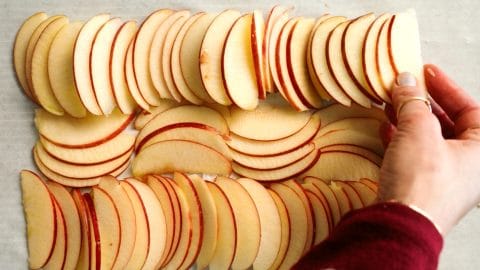
- Fan the apple slices over the pats of butter to create 3 long columns placed side by side. Start with the right or left side, running the apples evenly over the 3 pats of butter. Tuck the apples snugly against each other so no parchment peeks through (they will go up and over the pats of butter). Arrange the apples so they are fanning either directly towards or directly away from you.
- Once you’ve finished the first column, complete the middle column, nestling the apples between the 2 columns of butter so they are directly on the parchment. For this column, lay the apples in short rows with the fans pointing left, then right (it will be slightly narrower than the other 2 columns)
- Then, do the final column, arranging it over the remaining pats. You’re aiming for a rectangle roughly 8×10 inches.
- Unfold the puff pastry on a lightly floured work surface. Roll it into a rectangle that’s about 2 inches longer than the apples on each side (mine was 10×13). Drape the pastry over the apples like a blanket. With the tines of a fork, press all the way around the edges of the pastry to create a border.
- Brush the pastry lightly and evenly with the egg wash. Dab up any pools with a paper towel.
- Bake for 30 minutes on the center rack, until the pastry is deeply golden and puffed.
- Let rest for 5 to 10 minutes (some juices will have escaped and browned; simply scoop them away with a spoon and discard). Set a large cutting board over the pan and with one big, confident motion, flip it over. Lift away the pan and peel off the parchment. Dust with powdered sugar as desired and slice into squares.
Notes
- TO STORE: This tart is best enjoyed the day it’s made but can be stored at room temperature for 1 to 2 days. Rewarm in the oven or a toaster oven.