


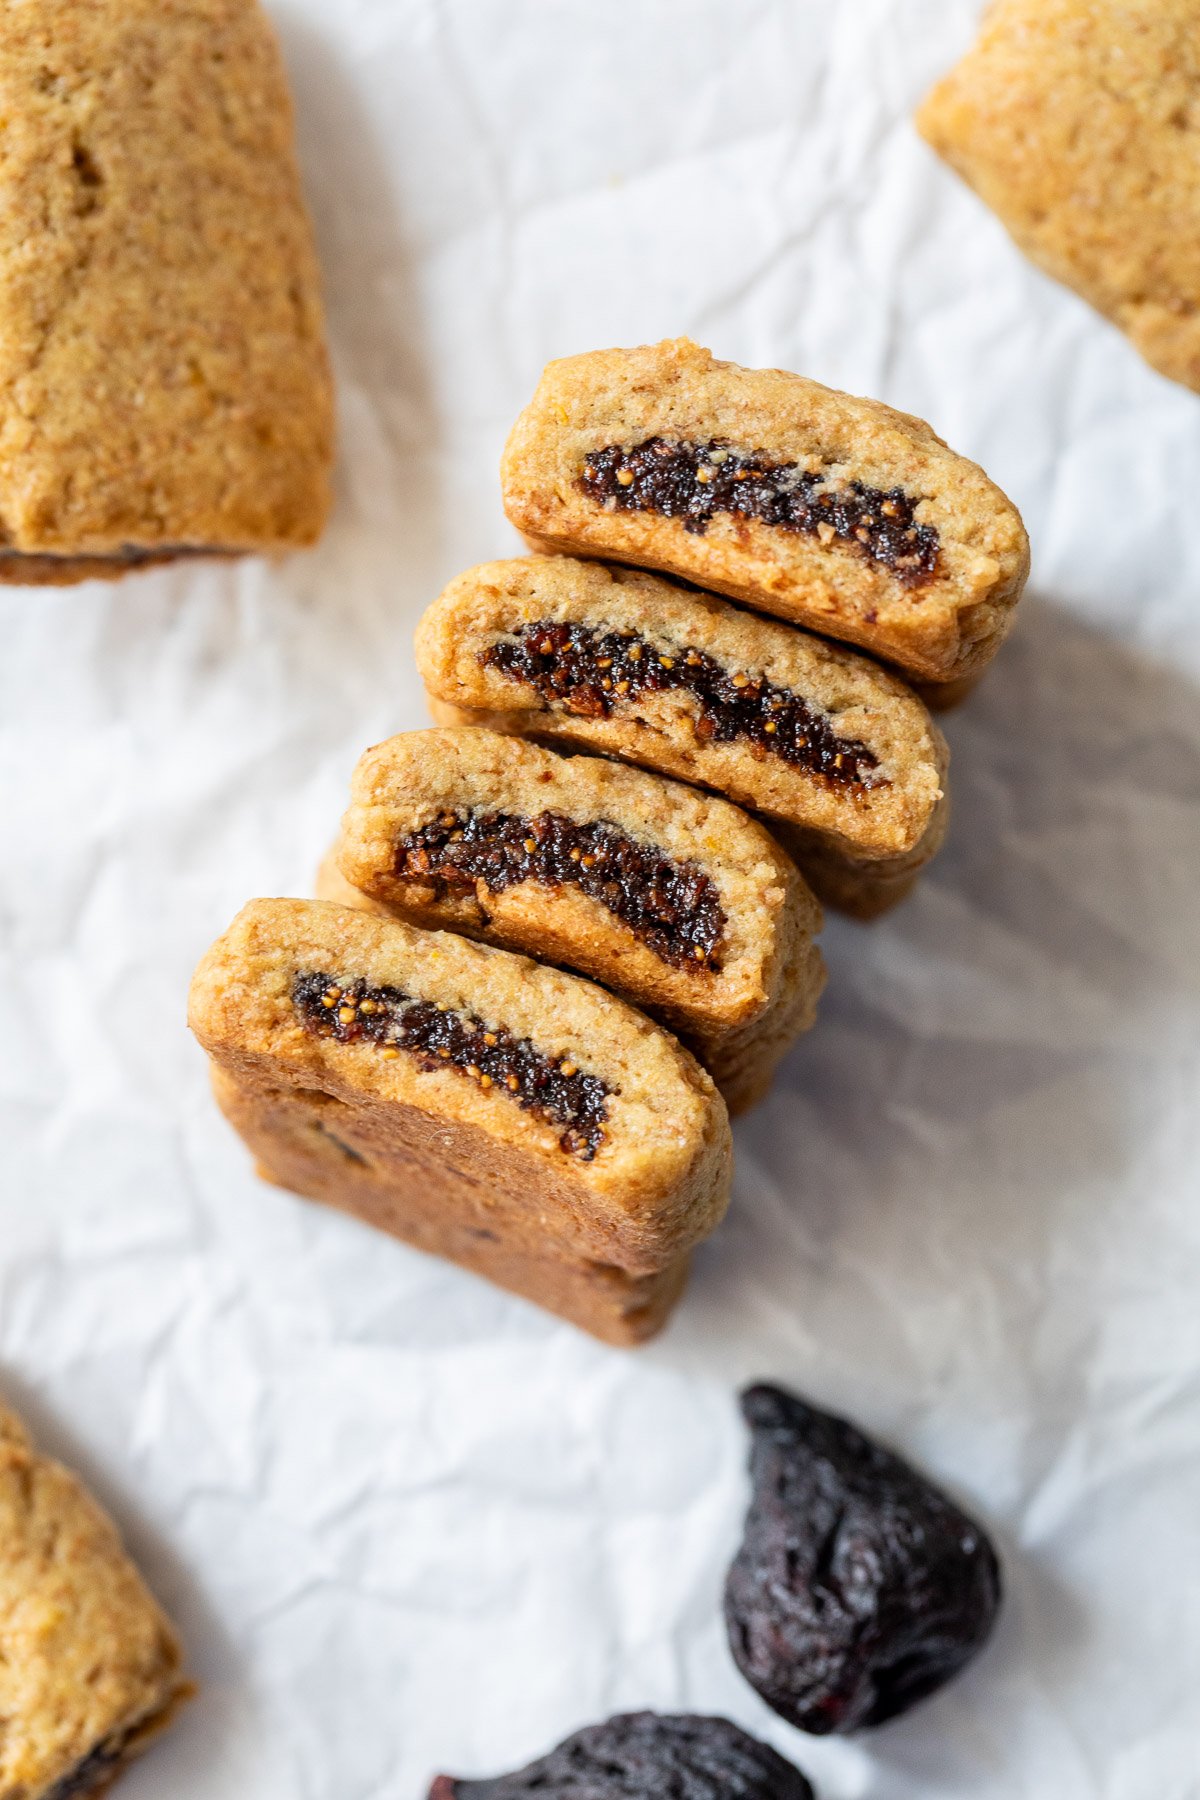
Soft, chewy, and naturally sweet, homemade Fig Bars are a more wholesome version of the cookie aisle classic. They’re fun to make, packed with fiber, and yield enough to feed a crowd—or pack into lunches all week long!
Email Me the Recipe!
From time to time, we'll send you Well Plated emails. You can unsubscribe anytime. Have an account? Log In.
Homemade fig bars take me back to childhood!

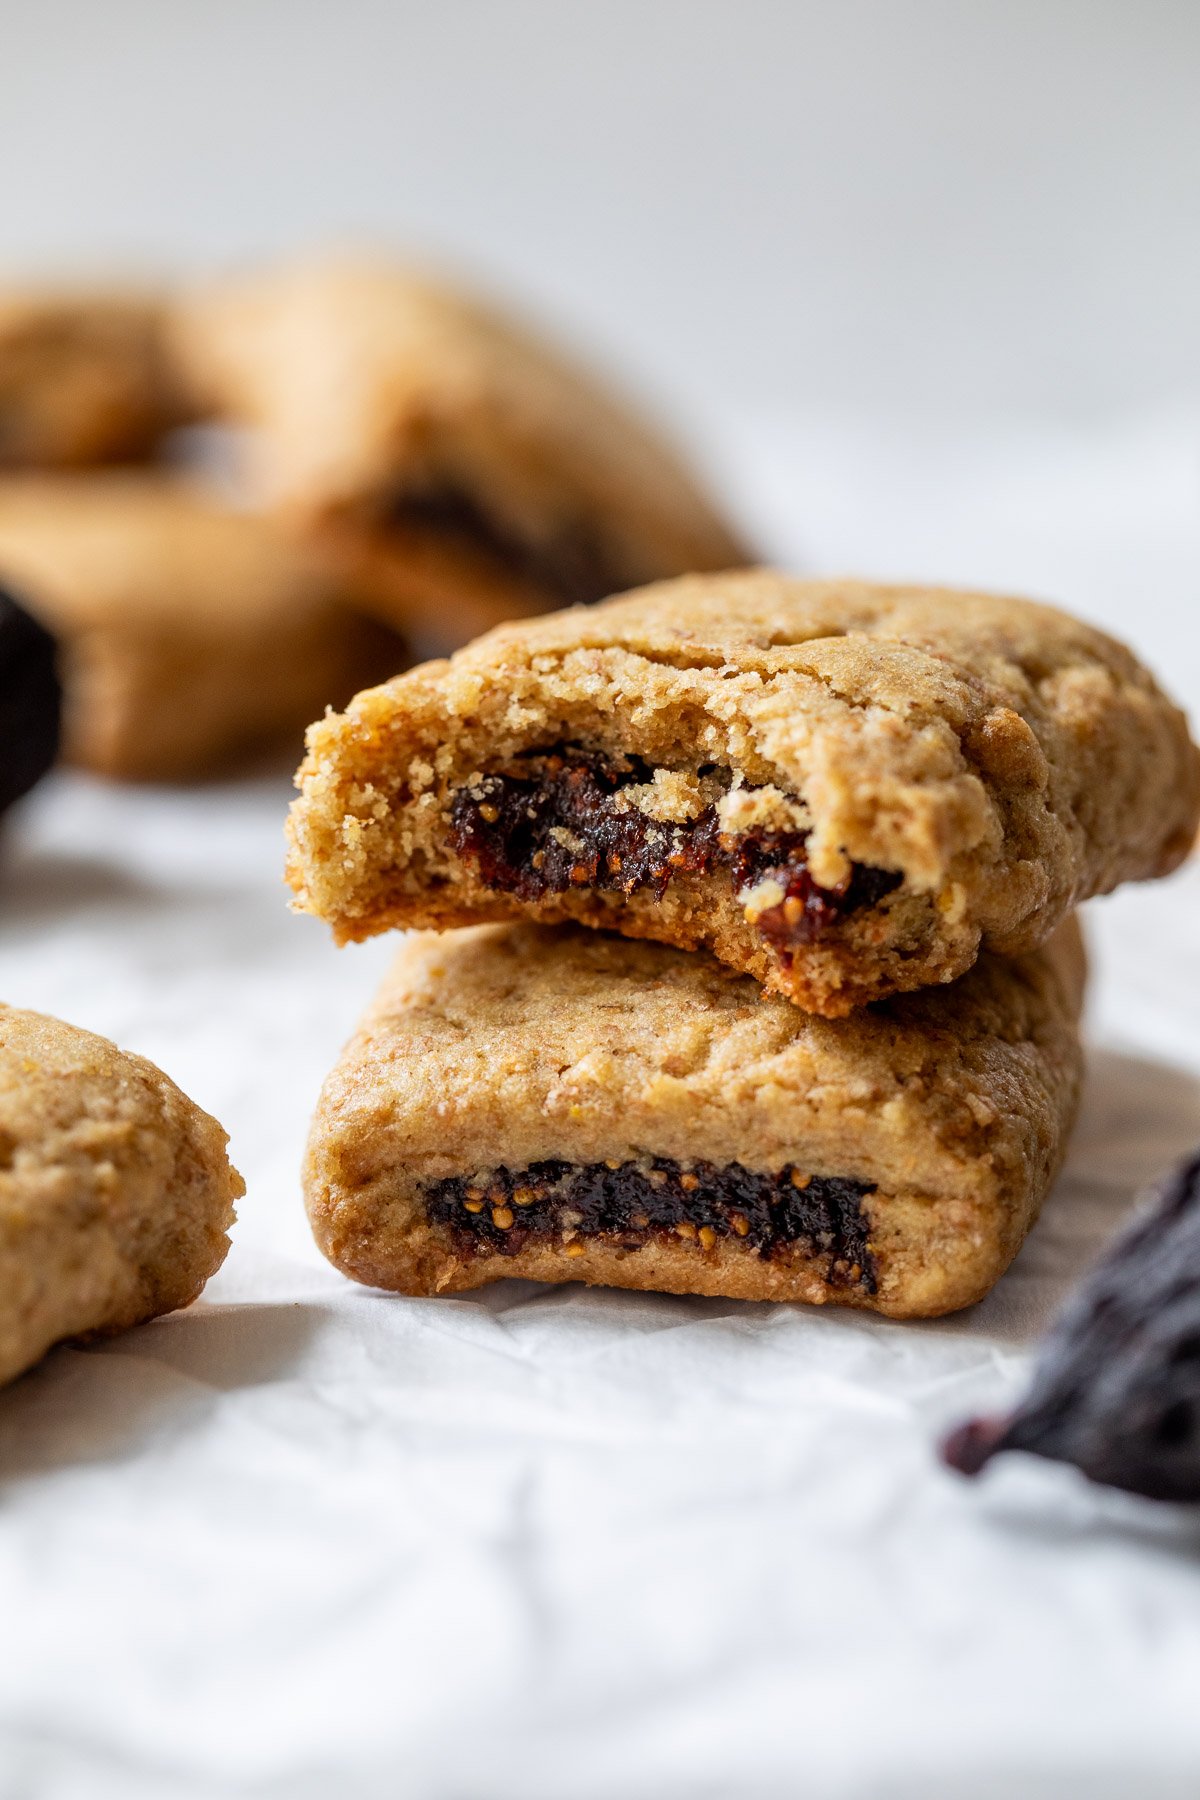
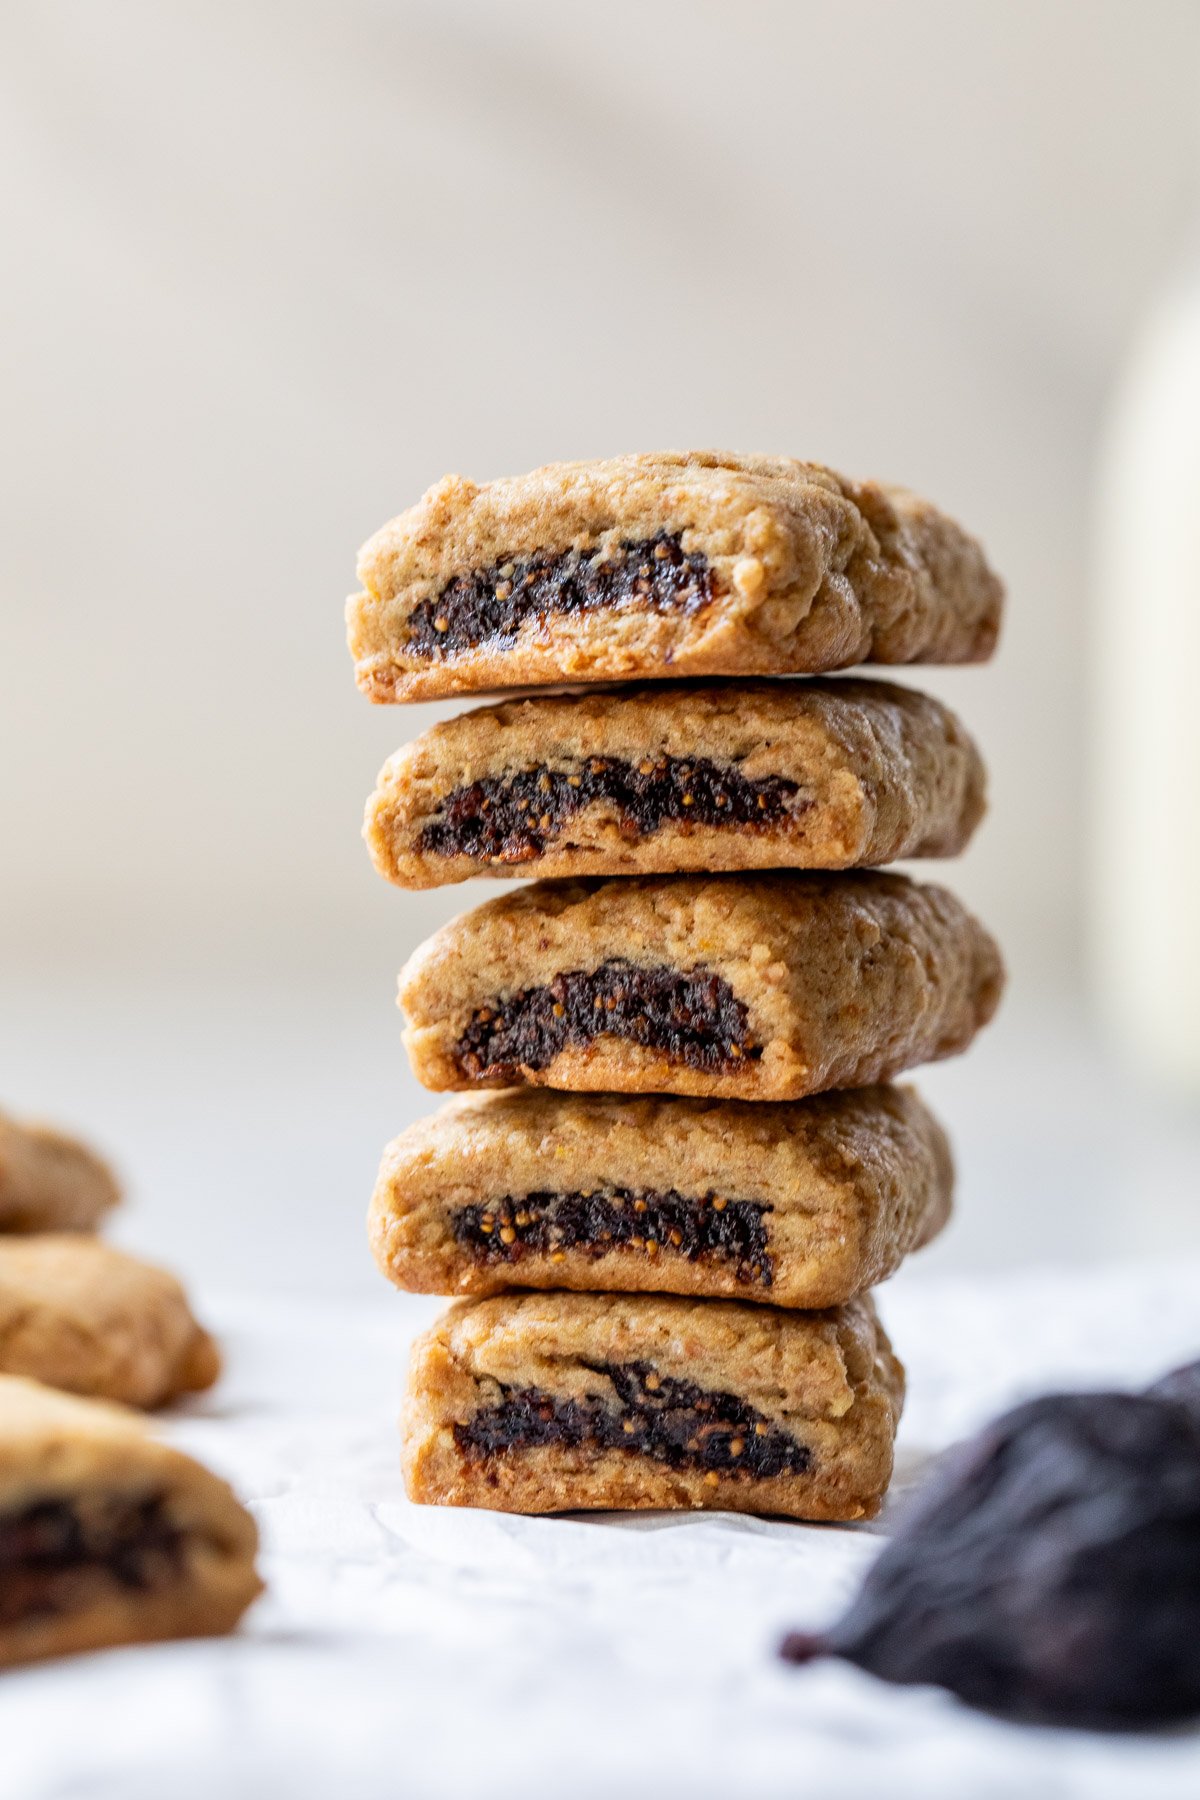
There’s just something about Fig Newtons! I love how the thick, sticky fig filling keeps the dough that encases it so moist and tender; that soft bite gives me an instant hit of nostalgia every time.
But you know what’s even better than a store-bought Fig Newton? Homemade fig bars!
- Made with whole wheat flour, with a filling that’s naturally sweet from figs and just a touch of maple syrup, these fig bars are healthier than the ones you get from the cookie aisle.
- Fiber is having a moment lately and you will be glad to know that these fig bars are a fiber-rich treat that’s much more appealing than fiber powders or wafers. (These Fig and Date Energy Balls are a great source of fiber too!)
- The flavor and texture are on point—ultra-moist and tender dough, that sticky, fabulous filling, and orange zest and juice for bright citrus flavor that balances the natural sweetness of the figs. This version has much more depth than store-bought.
These fig bars are kid-approved, and adults who grew up eating Fig Newtons will be delighted by them too!
Key Ingredients
You’ll find the full list of ingredients in the recipe card below, but here are some notes to keep in mind.
For the Fig Bar Dough
- Butter. Make sure the unsalted butter comes to room temperature so it’s easy to mix with the rest of the dough ingredients.
- Brown Sugar. This adds a note of caramel to the flavor of the dough, and it’s also key to that moist, tender crumb. You can use light or dark brown sugar for these fig bars.
- Egg. Let this come to room temperature too.
- Vanilla Extract and Orange Zest. These add flavor to the dough so it’s not just a delivery mechanism for the fig filling, but tasty in its own right!
- Flour. I use a combination of whole wheat flour and all-purpose flour. This adds some whole grain goodness to the dough without making it dense.
For the Fib Bar Filling
- Black Mission Figs. Remove the stems before starting the recipe. Use any extras to make Fig Goat Cheese Appetizer Bites for your next party!
- Orange Juice + Zest. These perk up the flavor of the fig bar filling, making it fresher and more dynamic than figs alone.
- Maple Syrup. Not just for sweetness! Maple syrup also has a nice earthy, cozy flavor that you’ll appreciate in the filling.
How to Make Fig Bars
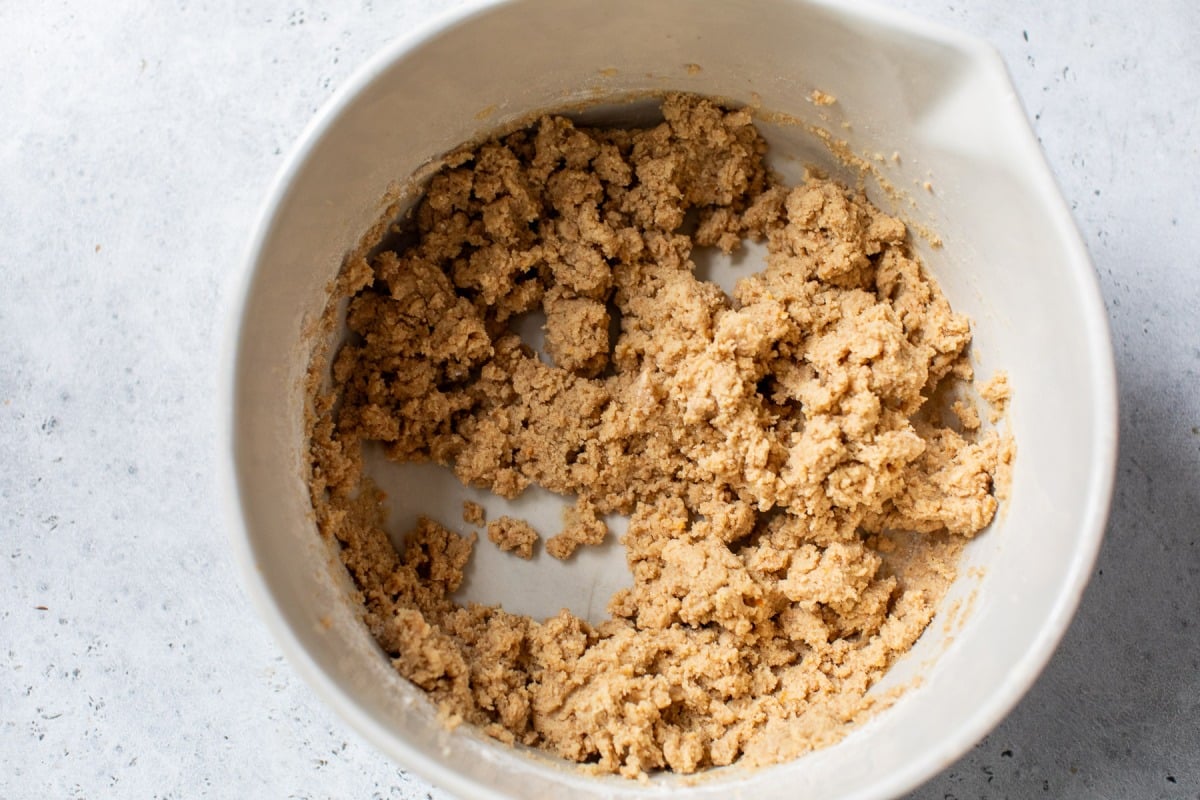


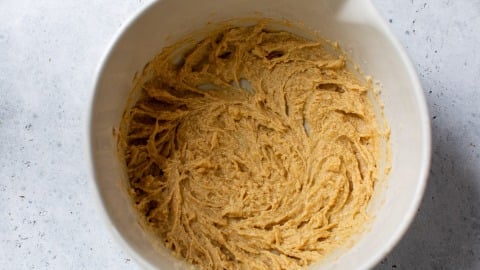
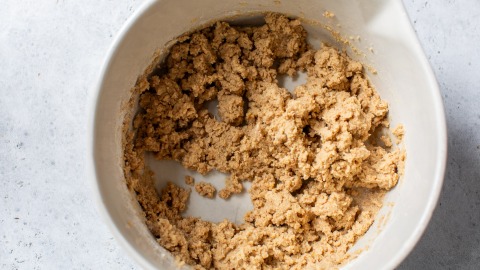
Make the Dough. Cream the butter and sugar, then beat in the egg, followed by the vanilla, and finally the orange zest. Whisk the dry ingredients in a separate bowl, then add to the bowl with the wet ingredients and mix on low speed.
Chill. Cover the dough with plastic wrap and refrigerate for a minimum of 2 hours or up to 2 days. (Chilling makes it easier to roll without sticking!)
Make the Filling. Combine all the filling ingredients except the maple syrup in a saucepan with 1/2 cup of water. Bring to a simmer over medium heat, then reduce heat to low and continue to simmer until the figs are soft and the liquid is cooked off.
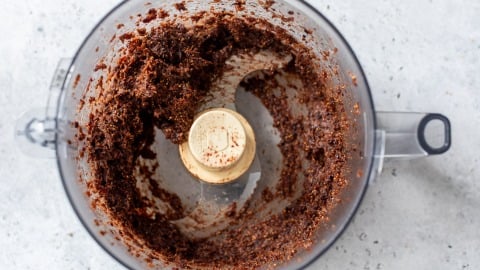
Process. Transfer the figs to a food processor, add the maple syrup, and process until smooth. Transfer to a large zip-top bag.
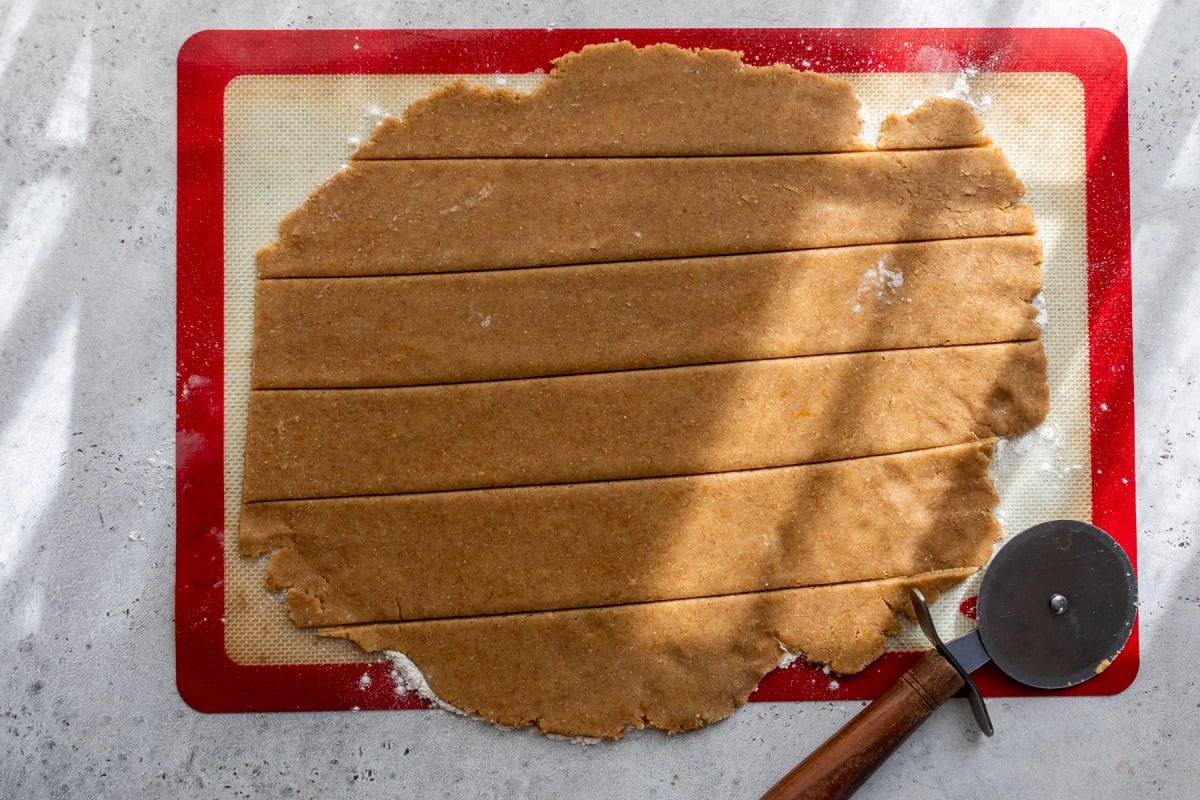
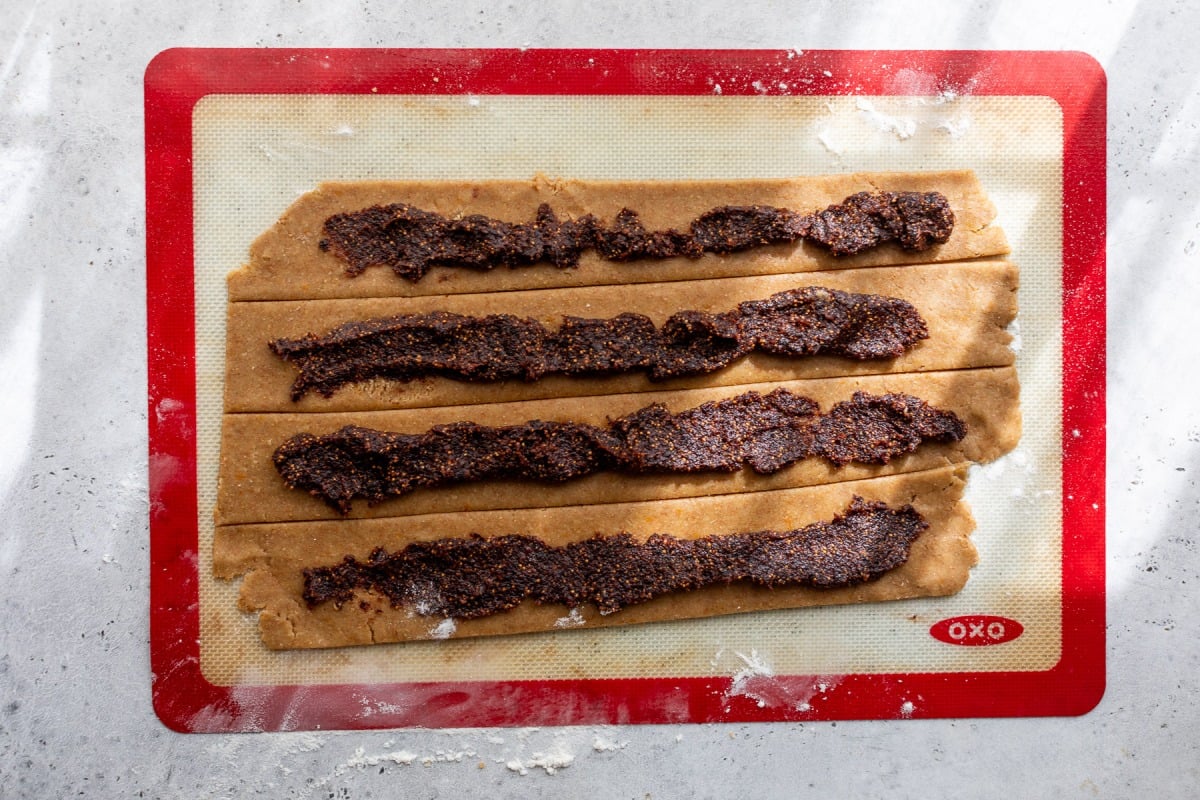
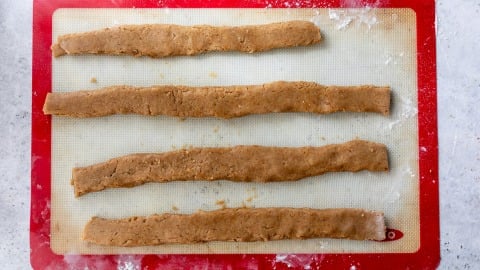
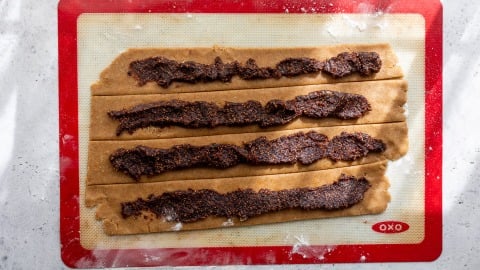
Roll Out the Dough. Roll the dough into a 12×12-inch square on a lightly floured work surface. Slice it into four 3-inch strips.
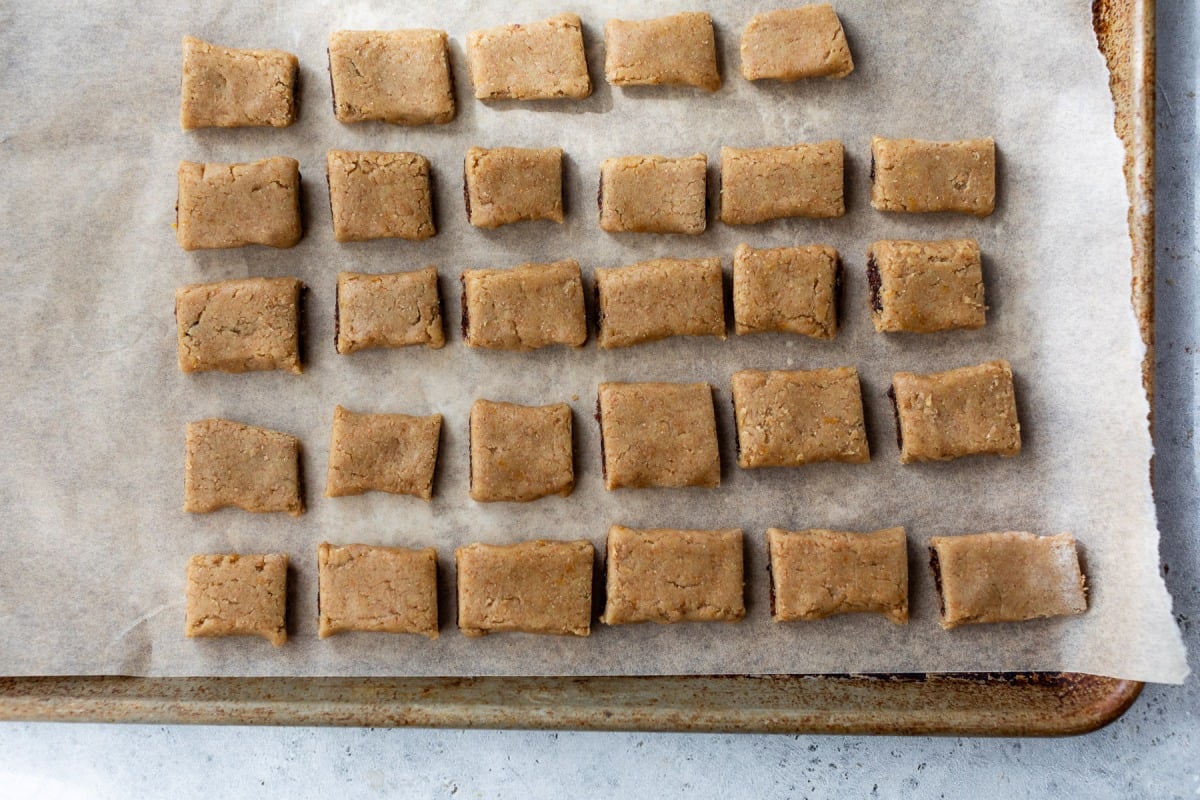
Assemble. Pipe the filling down the middle of each dough strip, then fold the dough over the filling. Flip, seal, and cut into 2-inch pieces. Set the cookies on a greased or lined baking sheet with the seam-side down.
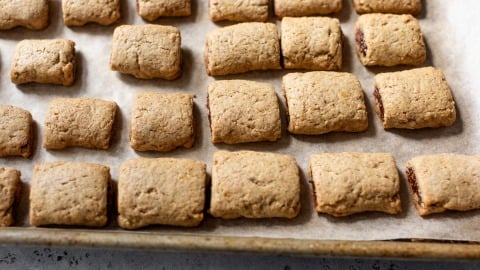
Bake. Place the pan in the oven and bake for 17 to 18 minutes, or until firm. Stack the warm fig bars in an airtight container with a paper towel between each layer; close the container and cool for 6 hours, then ENJOY!
Recipe Variations
- Add some warm spices. Ground cardamom would be fantastic with the figs and orange, but you can’t go wrong with cinnamon either. Add a few pinches to the filling, to taste.
- Incorporate other dried fruits. Swap up to half the figs for dates, dried apricots, dried cherries, etc.
- Make gluten-free fig bars. Substitute a 1:1 gluten-free baking blend for the all-purpose and whole wheat flour.
- Give it some crunch. Fold some chopped walnuts or pecans into the fig paste.
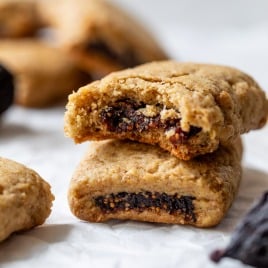
Fig Bars
Email Me the Recipe!
From time to time, we’ll send you Well Plated emails. You can unsubscribe anytime. Have an account? Log In.
Ingredients
For the Dough:
- ½ cup 1 stick unsalted butter room temperature
- ½ cup brown sugar light or dark
- 1 large egg at room temperature
- 1½ teaspoons pure vanilla extract
- 1 teaspoon orange zest
- ¾ cup all-purpose flour
- ¾ cup whole wheat flour
- ¼ teaspoon baking soda
- ½ teaspoon kosher salt
For the Filling:
- 10 ounces dried black mission figs 1½ cups, stemmed
- ¼ cup freshly squeezed orange juice
- 1 teaspoon orange zest
- ½ teaspoon kosher salt
- ½ cup water
- 1 tablespoon pure maple syrup
Instructions
- Make the dough: In the bowl of an electric mixer fitted with the paddle attachment, beat the butter and sugar until light and fluffy, about 2 minutes. Beat in the egg, then the vanilla, then the orange zest, beating well after each addition.

- In a separate bowl, combine the all-purpose flour, whole wheat flour, baking soda, and salt. Add the dry ingredients to the wet and mix on low speed, just until combined.
- Cover the dough with plastic wrap and refrigerate for at least 2 hours or for up to 2 days.
- Meanwhile, make the filling: In a medium saucepan, combine the figs, orange juice, orange zest, and salt. Add ½ cup water and bring to a simmer over medium heat. Reduce the heat to low and simmer until the liquid is mostly evaporated and the figs are softened, about 10 minutes.
- Transfer the fig mixture to a food processor along with the maple syrup. Process into a smooth paste, scraping down the sides of the bowl with a rubber spatula as needed. Transfer the paste to a gallon-sized zip-top bag.
- Preheat the oven to 350°F. Grease a large baking sheet with cooking spray or line with parchment paper or a silicone baking mat.
- On a lightly floured work surface, roll the dough into a 12×12-inch square that is about ¼ -inch thick. If the dough is too cold to work with, let it sit at room temperature for 2 to 3 minutes. With pizza cutter, slice the dough into four equal strips 3 inches wide.
- Snip off a corner of the bag with the filling. Pipe a line of filling (about 1 inch thick) down the center of each strip of dough. Gently fold the dough over the filling to shape into a flattened log—fold each of the 2 long sides over the filling in turn so that the final log is in thirds as if you were folding a letter for an envelope. Gently flip and press on the log to seal the edges closed. Cut the logs into 2-inch pieces.
- Place cookies seam-side down on the prepared baking sheet. Bake for 17 to 18 minutes, until set and firm. Remove from the oven and immediately stack the warm cookies in an airtight container with a paper towel between each layer. Seal closed for at least 6 hours before serving (this yields a softer texture).

Notes
- Adapted from Serious Eats, who had the great tip about storing the bars while still warm.
- TO STORE: Store these fig bars in an airtight container for up to 5 days or in the refrigerator for up to 10 days. Bring to room temperature before serving.
- TO FREEZE: Freeze the cooled fig bars in a freezer bag or airtight container for up to 2 months. Thaw overnight in the refrigerator or at room temperature.


Can’t wait to try these as we used to love Fig Newtons. But I’m confused about the filling, then fold over part. I’d love to see a video. You say pipe the filling 1 inch thick, but do you mean 1 inch wide ? Is it down the middle of the 3 inch wide strip of dough, then you fold each side in toward the middle to enclose the fig mixture?
Hi Tari, we have step by step photos in the blog post and recipe card. You’ll be looking at the photo under Step 7 and Step 8 to see the thickness. Also for the folding: “fold each of the 2 long sides over the filling in turn so that the final log is in thirds as if you were folding a letter for an envelope.” I would do one and just practice with it until you feel comfortable folding the rest. Hope this helps!
I weigh my flour. The second time I made them, I used 120 grams of each flour. Almost a cup. Didn’t change anything else. yummy
Thanks Leslie!
I am so excited about this recipe!!! I made them using all whole wheat flour and my family LOVED them. I feel excited to make a healthier fig newton cookie recipe made with such wholesome ingredients, whole grain, and much lower sugar than store bought and that were such a huge hit for our family!! Will definitely make again. Highly recommend!
So glad to hear, Brittany! Thank you!
This took some time but was totally worth it. I used dried figs I got from a friend and added a bit of honey to the filling. The dough was soft and easy to roll once I chilled it. Ate a few warm and saved the rest for snacks.
Thank you Abbie!
I was actually wondering about how to use dried figs in this recipe. How would I adapt the recipe?
Hi Ali, we use dried figs in this recipe so you wouldn’t have to adapt it! Enjoy!
Made these with my mom and we had fun with them. My mom used to buy fig bars when we were kids, so she was excited to try homemade ones. They came out great, not too sweet and really comforting. We had them with tea while chatting. Simple but so good. Thanks
Thank you Camilla!
Tried making these for the first time today. The hardest part was waiting for them to cool because they smelled so good. The texture’s soft, not crunchy, and the sweetness is just right. I had fun making this. Thank you!
Thank you Rebecca!