
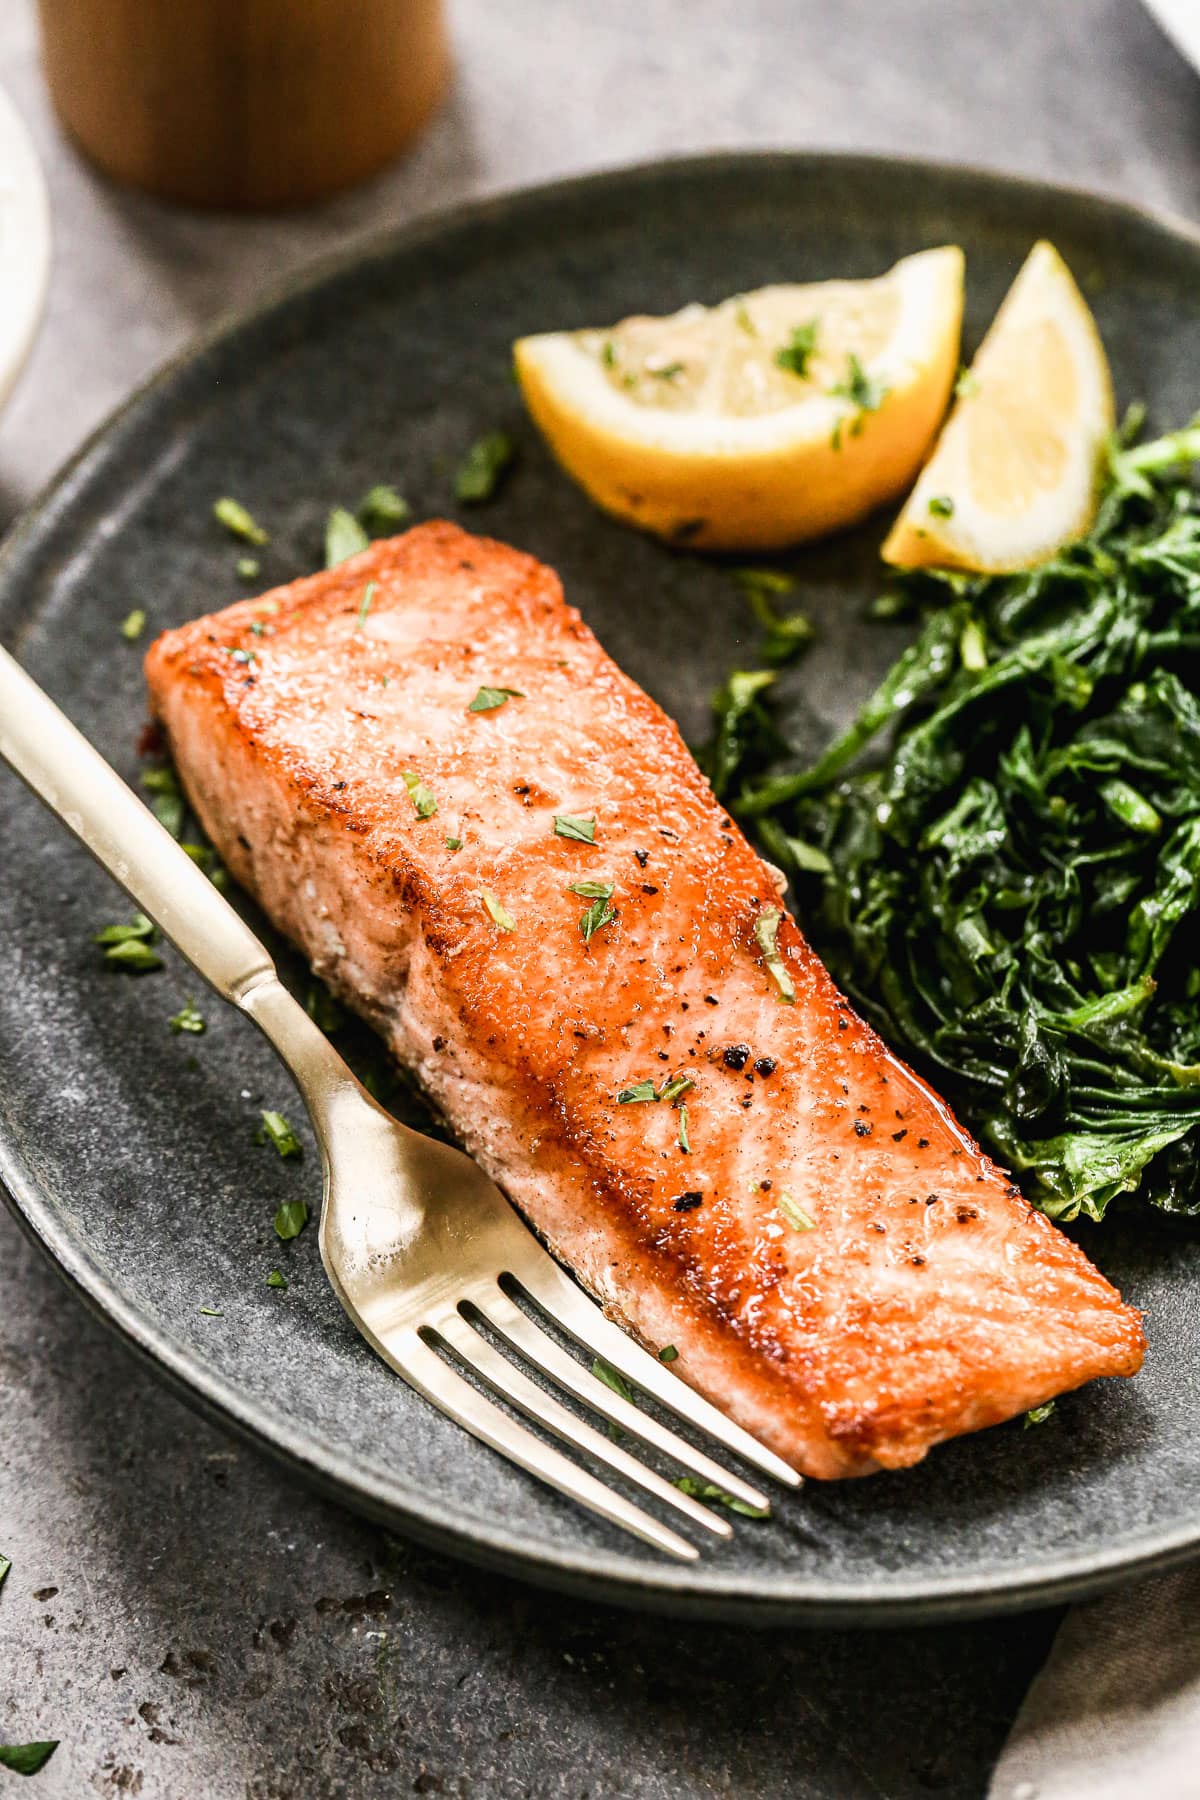
With a perfectly crisp exterior and moist, tender interior, this Pan Seared Salmon is the best of both worlds. In less than 30 minutes, you can have this restaurant-worthy meal on the table and ready to impress!

Why You’ll Love This Pan Fried Salmon Recipe
- It’s Just Impressive. Like Stuffed Salmon and Red Wine Braised Short Ribs, this is a dish that’s truly going to wow your guests (and you!). With a perfectly seared exterior and moist, flaky interior, they’ll think you are in a restaurant!
- For the Novice and Expert Alike. I used to think that only a professional chef could pull off seared fish, but it’s completely doable at home. With a few easy pointers, all of which I have included for you below, you will also know how to pan sear salmon perfectly! Try pan Seared Scallops next!
- Dry Fish Is So Yesterday. This recipe ensures your salmon is succulent, tender, and never dry. Pan searing helps lock in the moisture and prevent drying out, as Pan Fried Chicken Breast can certainly attest.
- It’s Versatile. While it’s anything but dull, this salmon doesn’t use bold flavors. Therefore, just about any side dish you serve will pair well with it (just like my quick Air Fryer Salmon Bites!)

5 Star Review
“If you’re having any doubts, consider this a sign: use this recipe!!!! This recipe is easy to follow, informative, and most importantly makes salmon that is DELICIOUS!”
— Caroline —
How to Make Pan Seared Salmon
The Ingredients
- Salmon. Rich in omega-3s, lean protein, and vitamins, pan seared salmon is good for you. It’s beloved in our kitchen for its mild flavor and versatility.
- Butter + Oil. Butter makes everything better, and the oil is key for helping create the crispy exterior. Make sure to use an oil with a high smoke point like canola, grapeseed, or avocado oil to avoid burning it.
- Lemon. A finishing squeeze of fresh lemon juice adds freshness and brightness.
The Directions

- Dry the Salmon. This ensures you get the best sear.

- Heat the Butter and Oil. Get the pan nice and hot!

- Season the Salmon. Do this right before cooking.

- Cook the Salmon. Start skin-side up for 5 to 6 minutes. Lower the salmon down into the pan AWAY from you. This will keep the oil from splattering on you.

- Flip the Salmon. Cook for 2 to 4 more minutes.

- Add a Squeeze of Lemon. For freshness and brightness. ENJOY!
Leftover Ideas
Flake leftover salmon into scrambled eggs for a protein-packed breakfast (it would be scrumptious on this Scrambled Egg Toast with Roasted Asparagus) or gussy up a slice of avocado toast.
What to Serve with Pan Seared Salmon
- Rice. Pan seared salmon and brown rice are a delicious combo! For variety, try this Lemon Rice.
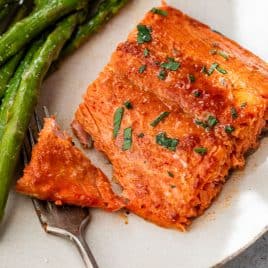
- Vegetables. Serve salmon with a side of Grilled Broccoli or Sauteed Spinach.
- Salad. Italian Farro Salad or Caesar Shaved Brussels Sprouts Salad with Crispy Chickpea Croutons would make a light and healthy side for this recipe.
- Potatoes. While meat-and-potatoes might be the adage, salmon and potatoes is a super satisfying meal. Try Crockpot Mashed Potatoes or Oven Roasted Potatoes.

Tips for the Best Pan Seared Salmon
Making pan fried salmon that you can proudly declare better than a restaurant comes down to a few rules.
Use the Right Equipment
- The best pan for salmon is one with a heavy bottom that you can heat to a high temperature and that conducts heat evenly. I have the best luck with stainless steel (this pan is the holy grail) and cast iron. A non-stick pan can work too, but it’s not my favorite for searing or pan frying, as it doesn’t get the surface of the fish *as* crisp.
- GET A FISH SPATULA. This long, flexible spatula is the one I use more than any other, and it is useful for so much more than fish. From turning Oven Roasted Vegetables, to flipping eggs and pancakes, to getting that perfect flip on your fillet, a fish spatula with its wide surface area is indispensable.
Use Salmon WITH the Skin On
- Making pan seared salmon without skin can be difficult. Keeping the skin on salmon makes it easier to flip, as the salmon is less likely to fall apart (also recommended for Instant Pot Salmon).
- Making pan seared salmon with skin insulates it and makes it more difficult to overcook.
Let the Salmon Come to Room Temperature
- This rule applies to just about any seared protein. Letting the salmon fillets come to room temperature ensures that the insides finish cooking at the same time the outside is crisp so that you do not overcook the fish waiting for its center to come to temperature.
- A minimum of 10 minutes before you’d like to cook the salmon, remove it from the refrigerator.
Pat It Dry
- Water is the enemy of well-seared salmon. Be sure to pat the fillets dry with paper towels before adding them to the pan.
Season the Fish Immediately Before Cooking
- Salt will draw moisture out of the fish. To help it stay dry (and thus more easily crisp), wait to season it until just before you add it to the pan.
- For a great rub, check out this Salmon Seasoning.
Wait to Add the Salmon Until the Pan is HOT
- If you add the salmon when the pan is too cool, you won’t achieve a good sear. Wait for your pan to reach medium-high heat.
- You know your pan is ready for searing when a drop of water dances and sizzles on the surface.
- Be sure to give the oil time to heat up too. (To cook salmon without any oil, try Poached Salmon.)
Sear the Flesh Side First
- Lovers of crispy, golden crust swear the salmon skin-side should be seared first. When cooked this way, the salmon is served with crispy skin side up. If you like to eat crispy salmon skin, skin-side first is probably best for you.
- Personally, I prefer to sear the flesh side of the salmon first and serve the salmon with the skin on the bottom. It gives the salmon a beautiful presentation and since I don’t personally enjoy eating salmon skin, I prefer to save that delightful crispy portion for the flesh side, which I do eat.
- It is easy to remove the salmon from the skin as you take bites.
Don’t Touch!
- For the best sear, do not disturb the salmon while it cooks on each side. It’s tempting to peek, but you won’t get that crispy exterior.
- When the salmon is done cooking, it will release easily from the pan. If it’s sticking, chances are it needs another minute or so.
- Pan fry salmon with the skin for 7 to 10 minutes total.

Pan Seared Salmon
Video
Email Me the Recipe!
From time to time, we’ll send you Well Plated emails. You can unsubscribe anytime. Have an account? Log In.
Ingredients
- 4 (6- to 8-ounce) salmon fillets skin on
- ½ teaspoon kosher salt plus a few extra pinches
- ¼ teaspoon ground black pepper
- 1 tablespoon unsalted butter
- ½ tablespoon canola, grapeseed, avocado, or another high smoke-point cooking oil
- 1 lemon cut into wedges
- Chopped fresh parsley or basil, or dill, optional for serving
Instructions
- Remove the salmon from the refrigerator and let stand at room temperature for at least 10 minutes. With a paper towel, pat the fillets very dry on both sides.

- Heat the butter and oil in a 12-inch cast iron or heavy stainless steel skillet over medium-high heat until the butter foams and the foam subsides, about 3 minutes. It’s important the pan is VERY hot before you add the salmon, or it won’t crisp properly.
- Just before adding it to the pan, season the flesh side of the salmon with 1/2 teaspoon salt and pepper.
- Carefully place the fillets in the skillet, skin-side up, lowering them down away from you to protect yourself from splatters. Sprinkle the skin side of the salmon with a pinch of kosher salt.
- Let the salmon cook on the first side completely undisturbed until the flesh appears cooked about 3/4 of the way up the fillet, about 5 to 6 minutes.
- With a fish spatula or similar long, wide, flexible spatula, carefully flip the fillets. They should release easily from the pan; if they are sticking, the salmon most likely isn’t ready yet. Let cook another 30 seconds or so, then try again.
- Reduce the pan heat to medium. Cook the salmon on the other side for 2 to 4 minutes more, until it is done to your liking (I remove the salmon at 130°F for medium). Remove to a plate and let rest 5 minutes. Squeeze lemon over the top and sprinkle with herbs. Serve hot or at room temperature.


Notes
- TO STORE: Refrigerate salmon in an airtight storage container for up to 2 days.
- TO REHEAT: Very gently rewarm leftovers in a skillet over medium-low heat or in the microwave.


So good
Thanks Vanessa!
Easy to make, family liked it very much. Skin side very nice, flesh just delicious
So glad to hear! Thank you Melissa!
Great recipe. My husband loves it and so do I!
So glad you enjoyed it, MaryAnn!
I have enjoyed many of your recipes. We just ate this salmon dish. I love salmon and have prepared it many times. This may be the BEST result I’ve ever had.
Thank you very much !
Yay! Thank you Roy!
This is a great and very easy recipe. I dry salt brine my salmon in the fridge for a few hours first. Then I bring up to room temp. pat dry if needed and follow your instructions. I have even used a recipe that calls only for kosher salt in the skillet with good results too. Salmon flipped in that one also.
Great to hear, thank you Jim!
Cooked according to the instructions, 11 minutes total and came out raw. This is not even a recipe this is just how to cook salmon so if you mess that part up then idk what to tell you
I’m sorry to hear that you had trouble with the recipe, Gigi. The timing has worked well for myself (and others) so I wished it would have been a hit for you too! I know it can be so disappointing to try a new recipe and it does not turn out for you.
Love this!! Made 4 pieces for myself and my husband. I figured I would eat most of it because he is super picky about his fish but he almost ate all of it lol. It was delicious and I will definitely be making this more often. Thank you and congrats on your new cookbook!
Love to hear that, thank you Elizabeth!
Simple and delicious. The salmon turned out perfectly cooked, I thought it might be overdone so I removed it from the pan after it cooked for 4 minutes on the second side. It was really GOOD!. I served it with mashed potatoes and sauteed kale. Thank you!
Glad to hear you enjoyed it, Donna! Thank you!