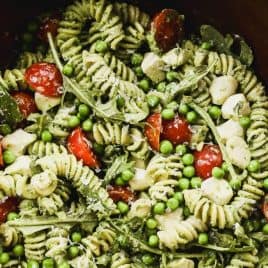
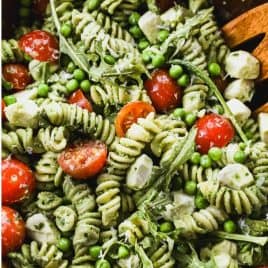

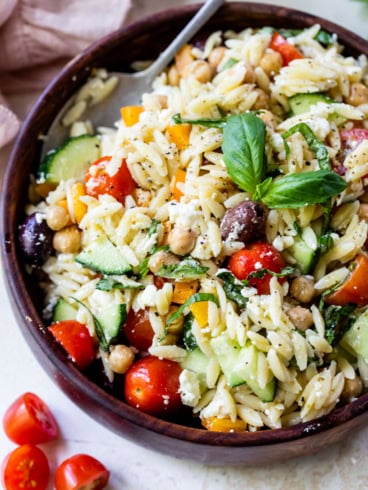
If you think pasta salad is a bore, you haven’t met Pesto Pasta Salad! Bright, herbaceous pesto adds big flavor, while fresh mozzarella pearls, peppery arugula, juicy tomatoes, and sweet peas make it absolutely swoon-worthy.

Email Me the Recipe!
From time to time, we'll send you Well Plated emails. You can unsubscribe anytime. Have an account? Log In.
A pasta salad that brings BIG flavor to the table.

This summery pesto pasta salad is the antidote to those bland, overly creamy pasta salads that populate cookouts and picnics. It’s juuuuust creamy enough, and the combination of homemade pesto and veggies is fresh and bright.
- Like Chicken Pasta Salad, this is a pasta salad that’s made for customizing with seasonal ingredients and your favorite mix-ins. I could see asparagus (or Roasted Asparagus) as a swap for frozen peas in the spring, and you can use a rainbow of fresh tomatoes from the garden during the summer.
- Although you can use mayo if you’d like, I make this with plain Greek yogurt; sour cream is another mayo-free option too. (For more pasta salads without mayo, bookmark my Chicken Caesar Pasta Salad and Caprese Pasta Salad.)
This pesto pasta salad fits right in with other deli-style salads like 7 Layer Salad and Potato Salad, perfect for serving on a plate with Grilled Chicken Breast.
5 Star Review
“I made this for a beach trip side dish and it could not have been better and more of a hit with my friends! So delicious, bright and flavorful!”
— Harley —

My Tips and Tricks for Perfect Pesto Pasta Salad
- Cook the Pasta al Dente. Because the pasta will soak up the dressing, if it’s cooked until it’s soft, it will become even softer in your pasta salad, ending up mushy and textureless. About a minute less than the instructions on the package is perfect.
- Take a Shortcut. If you want to use store-bought pesto instead of homemade Basil Pesto, you definitely can! Some varieties are very oily, though, so you may want to drain a little bit of oil off the top and then give the pesto a good stir in the jar before adding it to the pasta salad.
- Serve Right Away for Best Results. This pesto pasta salad tastes (and looks!) best at room temperature since the pesto will be bright green, the mozzarella will have the perfect texture, and the flavors will be poppin’. If you do need to store it for later, press plastic wrap over the top to slow the oxidation process.
- Avoid Adding Beefsteak Tomatoes. Use whole grape tomatoes or halved cherry tomatoes. If you want to use larger tomatoes, I recommend a variety that’s not very seedy, like Roma. Otherwise, you’ll end up introducing too much liquid to your pesto pasta salad.

A Few Recipe Variations
- Skip the Pine Nuts. If you have an allergy, you’re just not a fan, or you don’t feel like paying for them, cashews, walnuts, and almonds can all be used instead.
- Switch Up the Veggies. Need some ideas? Artichoke hearts, sun-dried tomatoes, roasted red peppers, and zucchini (raw or Roasted Zucchini) are all excellent.
- Add a Protein. Cooked cannellini beans or rotisserie chicken (or Baked Chicken Breast) can be added to this salad to make it a meal.
- Use Tortellini. Instead of pasta, use tortellini. You can skip the mozzarella balls if you go this route.

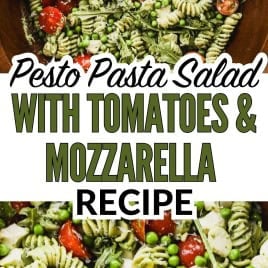
Pesto Pasta Salad
Video
Email Me the Recipe!
From time to time, we’ll send you Well Plated emails. You can unsubscribe anytime. Have an account? Log In.
Ingredients
For the Pasta Salad
- 8 ounces fusilli, rotini, or farfalle pasta
- 2 tablespoons nonfat plain Greek yogurt or mayonnaise or sour cream
- 1 ½ cups arugula
- 1 pint cherry tomatoes halved, or grape tomatoes
- 1 cup frozen peas thawed
- ½ cup mini mozzarella pearls or crumbled feta*
- ¼ cup freshly grated Parmesan cheese
- Extra virgin olive oil as needed
For the Pesto**
- 2 tablespoons pine nuts 1/3 cup walnuts, cashews, or nuts of choice; toasted***
- 1 large clove garlic
- 1 ⅓ cups fresh basil leaves
- 1 ⅓ cups spinach or chopped kale or arugula
- ½ teaspoon kosher salt
- ¼ teaspoon ground black pepper
- ⅓ cup extra-virgin olive oil
- 3 tablespoons freshly grated Parmesan cheese
Instructions
- Cook the pasta to al dente, according to the package instructions. Drain into a colander and rinse well under cold water. Shake out as much excess water as you can, then set on a towel to drain further while you make the pesto.
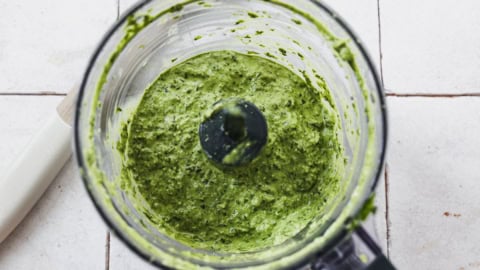
- Make the pesto: Place the pine nuts and garlic in the bowl of a food processor fitted with a steel blade. Blend for 10 long pulses. Add the basil, spinach, salt, and pepper. With the processor running, slowly pour in the olive oil through the feed tube. Puree until smooth, about 45 seconds to 1 minute. Scrape down the side of the food processor bowl as needed. Blend in the Parmesan.

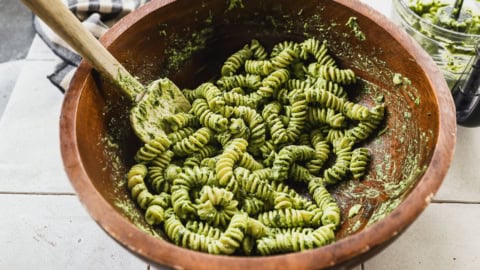
- Shake out the pasta once more, then transfer it to a large serving bowl. Stir the Greek yogurt into the pesto (you can blend it in right in the food processor if you’re making homemade), then scoop it over the pasta. Stir gently to coat (I find it easiest to use my hands).
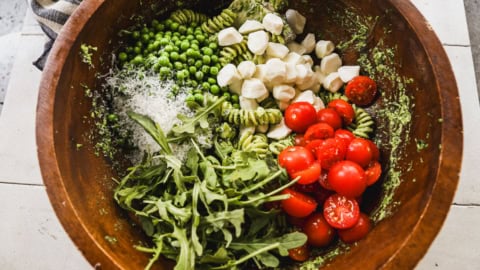
- Add the arugula, cherry tomatoes, peas, mozzarella pearls, and Parmesan. Stir to combine (again, it’s easiest to toss with your hands). If the pasta seems too thick or dry, stir in olive oil gradually as needed.
- Taste the pesto pasta salad and adjust the seasoning as desired. Serve at room temperature, or press a sheet of plastic wrap against the top to deter the pesto from losing its color and refrigerate until ready to serve.
Notes
- *If you use feta, the pasta salad will be saltier, so you most likely won’t need to season it as much at the end.
- **This recipe is a slightly reduced amount of my homemade Basil Pesto. You can also use 2/3 cup of the store-bought pesto of your choice.
- ***Toasting the nuts is optional, but really amps up the flavor of the pesto, so I recommend it. To toast: place the nuts in a small, dry skillet. Warm over low heat, shaking the pan often, until fragrant and toasted, about 4 minutes for pine nuts and 6 to 8 minutes for walnuts. BE PATIENT! Nuts burn when you crank up the heat.
- TO STORE: Refrigerate leftovers in an airtight container for 2 to 3 days. Let it sit on the countertop for a few minutes before serving and, if needed, add a drizzle of olive oil and toss to coat to loosen it up a bit.
Nutrition
What to Serve with Pesto Pasta Salad
- Chicken. This pasta salad with Grilled Chicken Thighs or Grilled Chicken Tenders is a perfect summer meal, or pair it with Air Fryer Chicken Breast if your cookout gets rained out.
- Pork. Keeping with the grilling theme, Grilled Pork Tenderloin would also be fabulous.
- More Picnic and Backyard BBQ Faves. Pea Salad, Fruit Salad—all those dishes you love for summer parties!


Once again a really good recipe from you! I made this last night and was pleasantly surprised at how tasty it was! Served it with grilled chicken and a green salad. The pesto was full of flavor, and just the right amount of texture, it was not too salty or bland. I’m really happy with this dish. Thank you, Erin!
Thank you so much, Katherine!
This came out wonderful! My basil is growing beautifully in my mini garden so I welcomed the chance to make your pesto pasta recipe. I used mayonnaise and it was a nice addition. It made the dish much smoother. Looking forward to tomorrow’s leftovers and seeing if it stays moist. Didn’t have arugula, so I added more spinach.
So glad you enjoyed it, Abby!
I made this for a beach trip side dish and it could not have been better and more of a hit with my friends! So delicious, bright and flavorful! Thanks for this fantastic and simple recipe! Your recipes have been a lifesaver.
Great to hear, thank you Harley!
Delicious!! Family loved it!
Thanks Samantha!
I wasn’t sure how this would turn out with all the green stuff in the pesto, but honestly, it worked. It tasted super fresh and had a nice creamy texture that wasn’t heavy. I did add a little more salt and olive oil at the end just my preference but it was good as is. Really enjoyed this one. Thank you!
So glad to hear, thank you Shanice!
Made this over the weekend for a family get-together, and it was a hit! I appreciated how fresh everything tasted, especially with the arugula and cherry tomatoes. The pesto was super easy to make. It’s not overly rich, which I liked, but I did add a little extra olive oil to loosen it up a bit.
Glad to hear you enjoyed it, Rebecca! Thank you!
I wasn’t sure about adding peas and arugula to a pasta salad, but they worked surprisingly well here. I used a mix of cashews and walnuts for the pesto and was happy with how it turned out. It’s the kind of dish that gets better as it sits, so leftovers were great too.
So glad you enjoyed it, Olivia! Thank you!
We absolutely loved it! I used cheese tortellini and a jar of pesto sauce, as those sounded like good options for what we were wanting. It’s delicious, easy and enough for is to enjoy the next day. I served it cold due to the hot weather and it was perfect! I’ll also make it as a warm dish when colder weather arrives. Either way, it’s another A+ recipe from Erin. Well Plated is my only food blog because I can rely on good recipes that work well for our tastes. Thanks again!
So glad to hear, Marnie! And thank you for being here and following along!